HANDSTAND · TRAINING GUIDE
How to Learn a Handstand as an Adult: From Wall Practice to Balance
You want to learn a handstand, but every time you kick up, your feet come straight back down. Or you can stay up against a wall, but as soon as the wall is gone, you cannot hold it. What I want you to practice first is balancing through your hands while keeping the wall available. I explained the method I used in my video. Here, I’ll go into more detail about what to focus on and when to move to the next step.
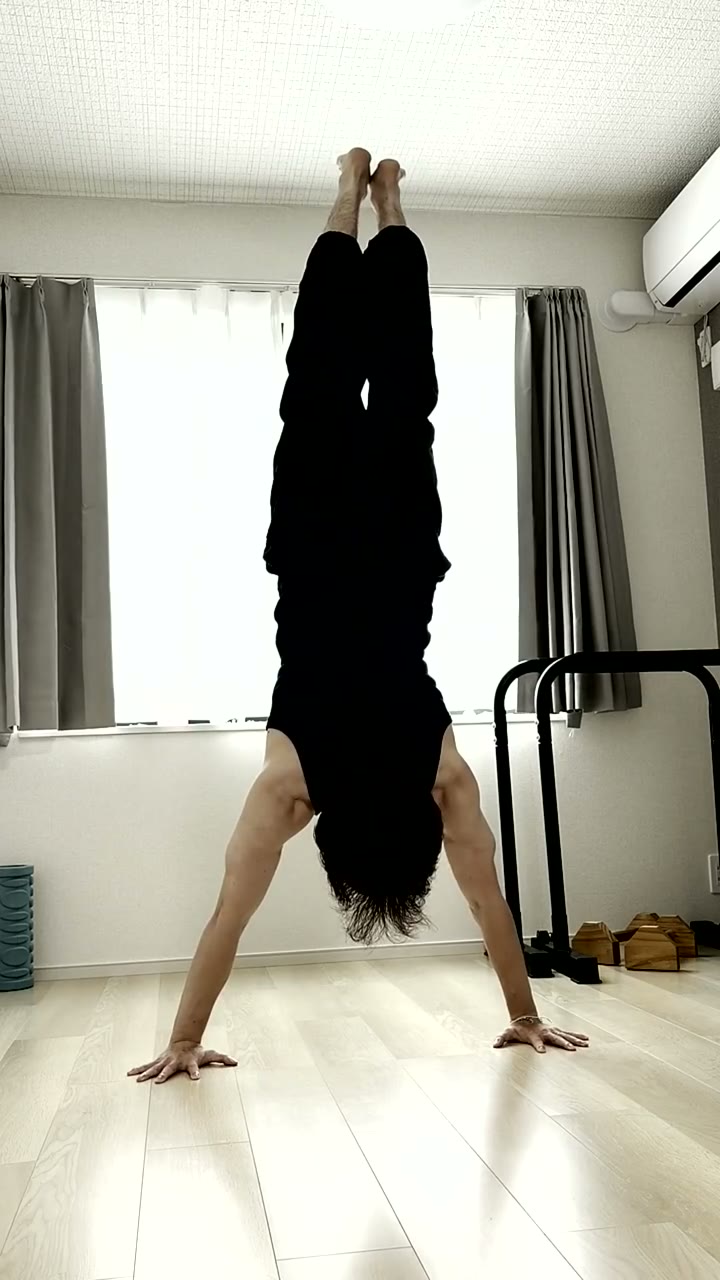
Watch the original handstand tutorial on Instagram ↗
First, understand how handstand balance works
A handstand does not end when you find the right position. Even when it looks still, you are making small adjustments to stay balanced. A big part of that is applying and releasing pressure through your fingers.
When your body starts tipping toward your fingertips, pressing them into the floor helps bring you back. But if you keep pressing too hard, your feet can come down toward where you started. You need to adjust the pressure to what your body is doing. The aim is to notice small changes before they become a large fall.
Beginners often start walking on their hands or moving them in a panic when they lose balance. If you want a stationary handstand that can develop into other skills, practice making corrections with your hands in place. That does not mean keeping them fixed when you need to come down. Moving a hand to exit is different from relying on walking to keep every attempt going.
If being upside down feels scary, start lower
Where I start someone depends on their exercise experience and how comfortable they feel. If kicking up to a wall feels manageable, we can start there. If it feels too intimidating, a frog stand can help introduce balancing on the hands closer to the floor. There is no need to rush into lifting both feet.
I sometimes use a headstand to introduce the feeling of being upside down. It is optional, and it is a different exercise that loads the head and neck. It is not a requirement for learning a handstand or something to improvise alone; learn it with appropriate instruction if you use it.
Before practice, gently move your wrists and shoulders and introduce weight through your hands in a lower position. Use a firm, non-slip surface and a clear wall, with enough space to come down to the side. Stop if you develop pain or dizziness.
Learn how to come down before chasing a hold
Alongside learning to stay up, learn how to get down when balance goes too far. The exit I use is a sideways, cartwheel-style turn: one hand stays planted while the other moves, allowing the body to turn and the feet to come down to the side instead of falling straight over your back.
This takes practice. A written description is not enough reason to try it from a full handstand for the first time. Learn the turn from a lower position, preferably with a coach, before relying on it upside down. For chest-to-wall practice especially, know your way down before going up. A wall does not remove every possibility of a fall.
Start with your back facing the wall
My preferred starting point is a back-to-wall handstand. Put your hands on the floor, bring your shoulders over your wrists, and kick up so your heels meet the wall lightly. You do not need to kick hard and crash into it. Finding the right amount of effort can take a few attempts.
I often find this easier to introduce than walking into a chest-to-wall position. Having the wall in the direction you might go over can also make it easier to concentrate on balance. It is my usual starting point, rather than a rule that every beginner must follow.
Keep your arms straight and keep pushing through your shoulders. Think about supporting yourself actively rather than sinking between your shoulders. If you cannot yet support the position comfortably, spend more time building that support in a lower position before attempting to balance.
Use your fingers to bring your heels away from the wall
Once you are up, press through your fingers to bring your heels slightly away from the wall. Do not push off with your feet. The point is to create the change through your hands. If your hands are too far from the wall or you are resting a lot of weight through your feet, check your setup rather than simply trying to press harder.
As your feet leave the wall, ease the pressure as needed. If you start drifting back toward the wall, press again. These are small, ongoing adjustments, not one big push followed by trying to freeze.
At first, you might not leave the wall at all. Or you might press too much and come straight down. That is part of learning the amount of pressure you need. Come away from the wall, return to it, and repeat. Gradually increase the time you can spend away from it.
A long hold resting against the wall can build support, but it does not automatically teach you to balance without it. In this drill, the wall stays nearby while you practice doing the balancing yourself.
Add chest-to-wall practice to explore the other direction
Facing the wall is useful too. I recommend practicing both orientations as you become comfortable, so you can explore both overbalance and underbalance: tipping toward your fingertips and falling back toward your starting side.
For chest-to-wall practice, walk your feet up and bring your hands closer only as far as you can control and get down from. Keep light contact through your toes and gradually reduce the weight you put into the wall while maintaining your shoulder push. You do not need to launch both feet away at once.
Pressing the fingers helps with tipping toward the fingertips. Pressing harder is not the answer to a fall in the opposite direction. Easing pressure and adjusting your shoulder position also matter. Keep the movements small and come down when the balance has gone beyond what you can control.
Learn to balance before chasing a perfect straight line
At the beginning, I do not focus heavily on whether someone has a slightly arched back or a perfectly straight line down to their toes. I prioritize straight arms, an active shoulder push, and learning to adjust through the fingers.
Once you can balance more consistently, you can refine your shoulder position, ribs, pelvis, and overall line. This does not mean ignoring painful arching or letting your arms bend and collapse. Keep a position you can support, while giving yourself time to improve how it looks.
Practice briefly and often, at a level your body can handle
How much you practice depends on your exercise history, your body’s response, and the time you want to commit. I prefer short, frequent opportunities to practice balance. Once you are used to the load, that might mean warming up and doing a few wall attempts at separate points in the day.
The goal here is balance, but your wrists and shoulders still support your bodyweight. A beginner does not need to jump straight into repeated daily sessions or work to exhaustion. Start with a small amount. Finish when your shoulder support or hand control starts deteriorating, and reduce practice or rest if the strain carries into the next day.
A session can be simple: prepare your wrists and shoulders, check that you can get down, then practice coming away from the wall and returning. Notice how often you can do that calmly and whether your pressure control improves, rather than measuring only your longest hold.
Move to freestanding kick-ups when your balance is repeatable
One mistake I see is leaving the wall too early. Holding for a few seconds once does not mean you have to stop using it. I want you to be able to come away from the wall, make adjustments, and stay there without immediately falling or returning to the wall. Build consistency across attempts before making freestanding kick-ups your main focus.
Getting into a handstand and balancing once you are there are separate skills. When you start practicing kick-ups without the wall, you are learning how much momentum to use to arrive in the position you already know how to balance. Missing the entry does not mean you have lost everything you learned at the wall.
It is normal for this to feel awkward at first. Keep practicing the small adjustments rather than rushing to graduate from the wall. As those calmer, more controlled moments become more frequent, use them as the foundation for your next step.